
Document overview
Workshop Manual PDF for DEUTZ FAHR 6175 W Profi PS → DF1GK402W0CD10001, Series 6W Profi family. Document language: English; 1,444 pages.
The corresponding English table of contents contains 42 sections and 383 individual topics.
Main sections included
- Introduction
- Safety
- Technical characteristics
- Calibrations and electronic diagnosis
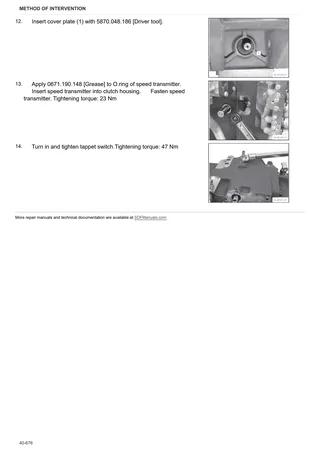
- Method of intervention
- Wiring diagrams
- Service Info
Document details
- Brand: DEUTZ FAHR
- Family: Series 6W Profi
- Model: 6175 W Profi PS
- Starting serial number: DF1GK402W0CD10001
- Document type: Workshop Manual
- Language: English
- Pages: 1,444
- File size: 276.26 MiB
- Format: Digital PDF download
Compatibility
Before purchasing, verify that your machine model and reference code match DEUTZ FAHR 6175 W Profi PS → DF1GK402W0CD10001.
Complete table of contents
Introduction
- Tightening Torques
- Pump tightening torques
- Wheel rim to hub screws and nuts tightening torques
- Tightening torques for nuts and bolts of electrical connections
- Installation of solenoid valves and cartridge valves
- Installation of quick couplers
- Units of measurement and conversion factors
Safety
Preface
- Important notes concerning safety
Important safety information
- Recognising hazards
- Indications for persons in contact with the tractor
Safety rules
- Risks during tractor preparation
- Risks during maintenance
- Work on machine systems
- Special disassembly/assembly/inspection procedures
Safety pictograms
- Replacing safety pictograms
Environmental risks
- Hazards associated with the operating environment
Technical characteristics
Engine
- Components of the 2012 2V UPS engine
- Test data and settings
- Tightening requirements 2012 2V UPS engine
- Components of the TCD 2012 L04/L06 2V DCR engine
- Test and adjustment data (L3)
- Tightening requirements TCD 2012 L04/L06 2V DCR engine
Engine accessories
- Expansion tank
Transmission
- Transmission (ZF TPT)
- Rear PTO
Front axle
- General characteristics
- Front axle
Bodywork – Cab – Platform
- Air conditioning system
Hydraulic system
- Brake logic block
- Bistable valve block
- Ancillary utility distributor 4-way electronically controlled version
- Ancillary utility distributor – 4-way mechanically controlled version
- Ancillary utility distributor 8-way electronically controlled version
- Ancillary utility distributor 8-way mechanically controlled version
- Ancillary utility distributor – Front distributor and lift module
- Rear lift distributor
- Delivery line filter – ancillaries/SAC circuit
- LS variable displacement pump filter
- Hydraulic power steering (OSPD)
- 45 cc variable displacement pump
- Gear pump
- Compressor
- Master cylinder
- Priority valve
Calibrations and electronic diagnosis
Diagnostic tools
- D-Tech and diagnostic ports
- D-TECH App
ECU alarms
- SDF Severity of alarms
- ECU ALARMS
Software management
- Engine dataset upgrade
Method of intervention
- Tools for engine disassembly and reassembly
- Workshop tools for engine disassembly and reassembly
- Tools for engine disassembly and reassembly
- Workshop tools for engine disassembly and reassembly
B0 – Engine
- Starter motor
- Separating engine / transmission
- Complete engine
- Water pump / alternator drive belt
- Air conditioning compressor drive belt
- Tension adjustment of the fan and air conditioning compressor drive belt
- Alternator, fuel pump and water pump drive belt
- Tension adjustment of the alternator, fuel pump and water pump drive belt
- Check the compression value (L3)
- Assembly and disassembly of the engine on the assembly stand (L3)
- Valve clearance adjustment (with the exhaust gas recirculation module absent or removed) (L3)
- Valve clearance adjustment (with the exhaust gas recirculation module installed) (L3)
- Disassembly and assembly of the rocker and support (L3)
- Disassemble and complete the rocker and support, check
- Disassembly and assembly of the cylinder head (L3)
- Valve assembly and disassembly (L3)
- Valve check (L3)
- Check the valve guide (L3)
- Check the valve residual (L3)
- Crankshaft check (L3)
- Replace the crankshaft O-ring (flywheel end) (L3)
- Replace the crankshaft O-ring (opposite end to flywheel) (L3)
- Connecting rod drum check (L3)
- Assembly and disassembly of the crankshaft (L3)
- Disassembly and assembly of the piston and connecting rod drum (L3)
- Check the piston (L3)
- Check the piston rings and piston grooves (L3)
- Assembly and disassembly of the piston cooling nozzles (L3)
- Removing and fitting crankcase breather (L3)
- Checking cylinder (L3)
- Removal and refitting of the front cover (opposite end to flywheel) (L3)
- Disassembly and assembly of the connector box (L3)
- Disassembly and assembly of the gear case cover (L3)
- Assembly and disassembly of the camshaft (L3)
- Check the camshaft (L3)
- Disassembly and assembly of the turbocharger (L3)
- Disassembly and assembly of the turbocharging air duct (L3)
- Fitting and removing the exhaust gas recovery module (L3)
- Removing and fitting the fuel delivery pump (driven by ribbed V-belt) (L3)
- Removing and fitting the fuel control unit (L3)
- Removing and fitting high pressure pump (installation position A) (L3)
- Removing and fitting high pressure pump (installation position B) (L3)
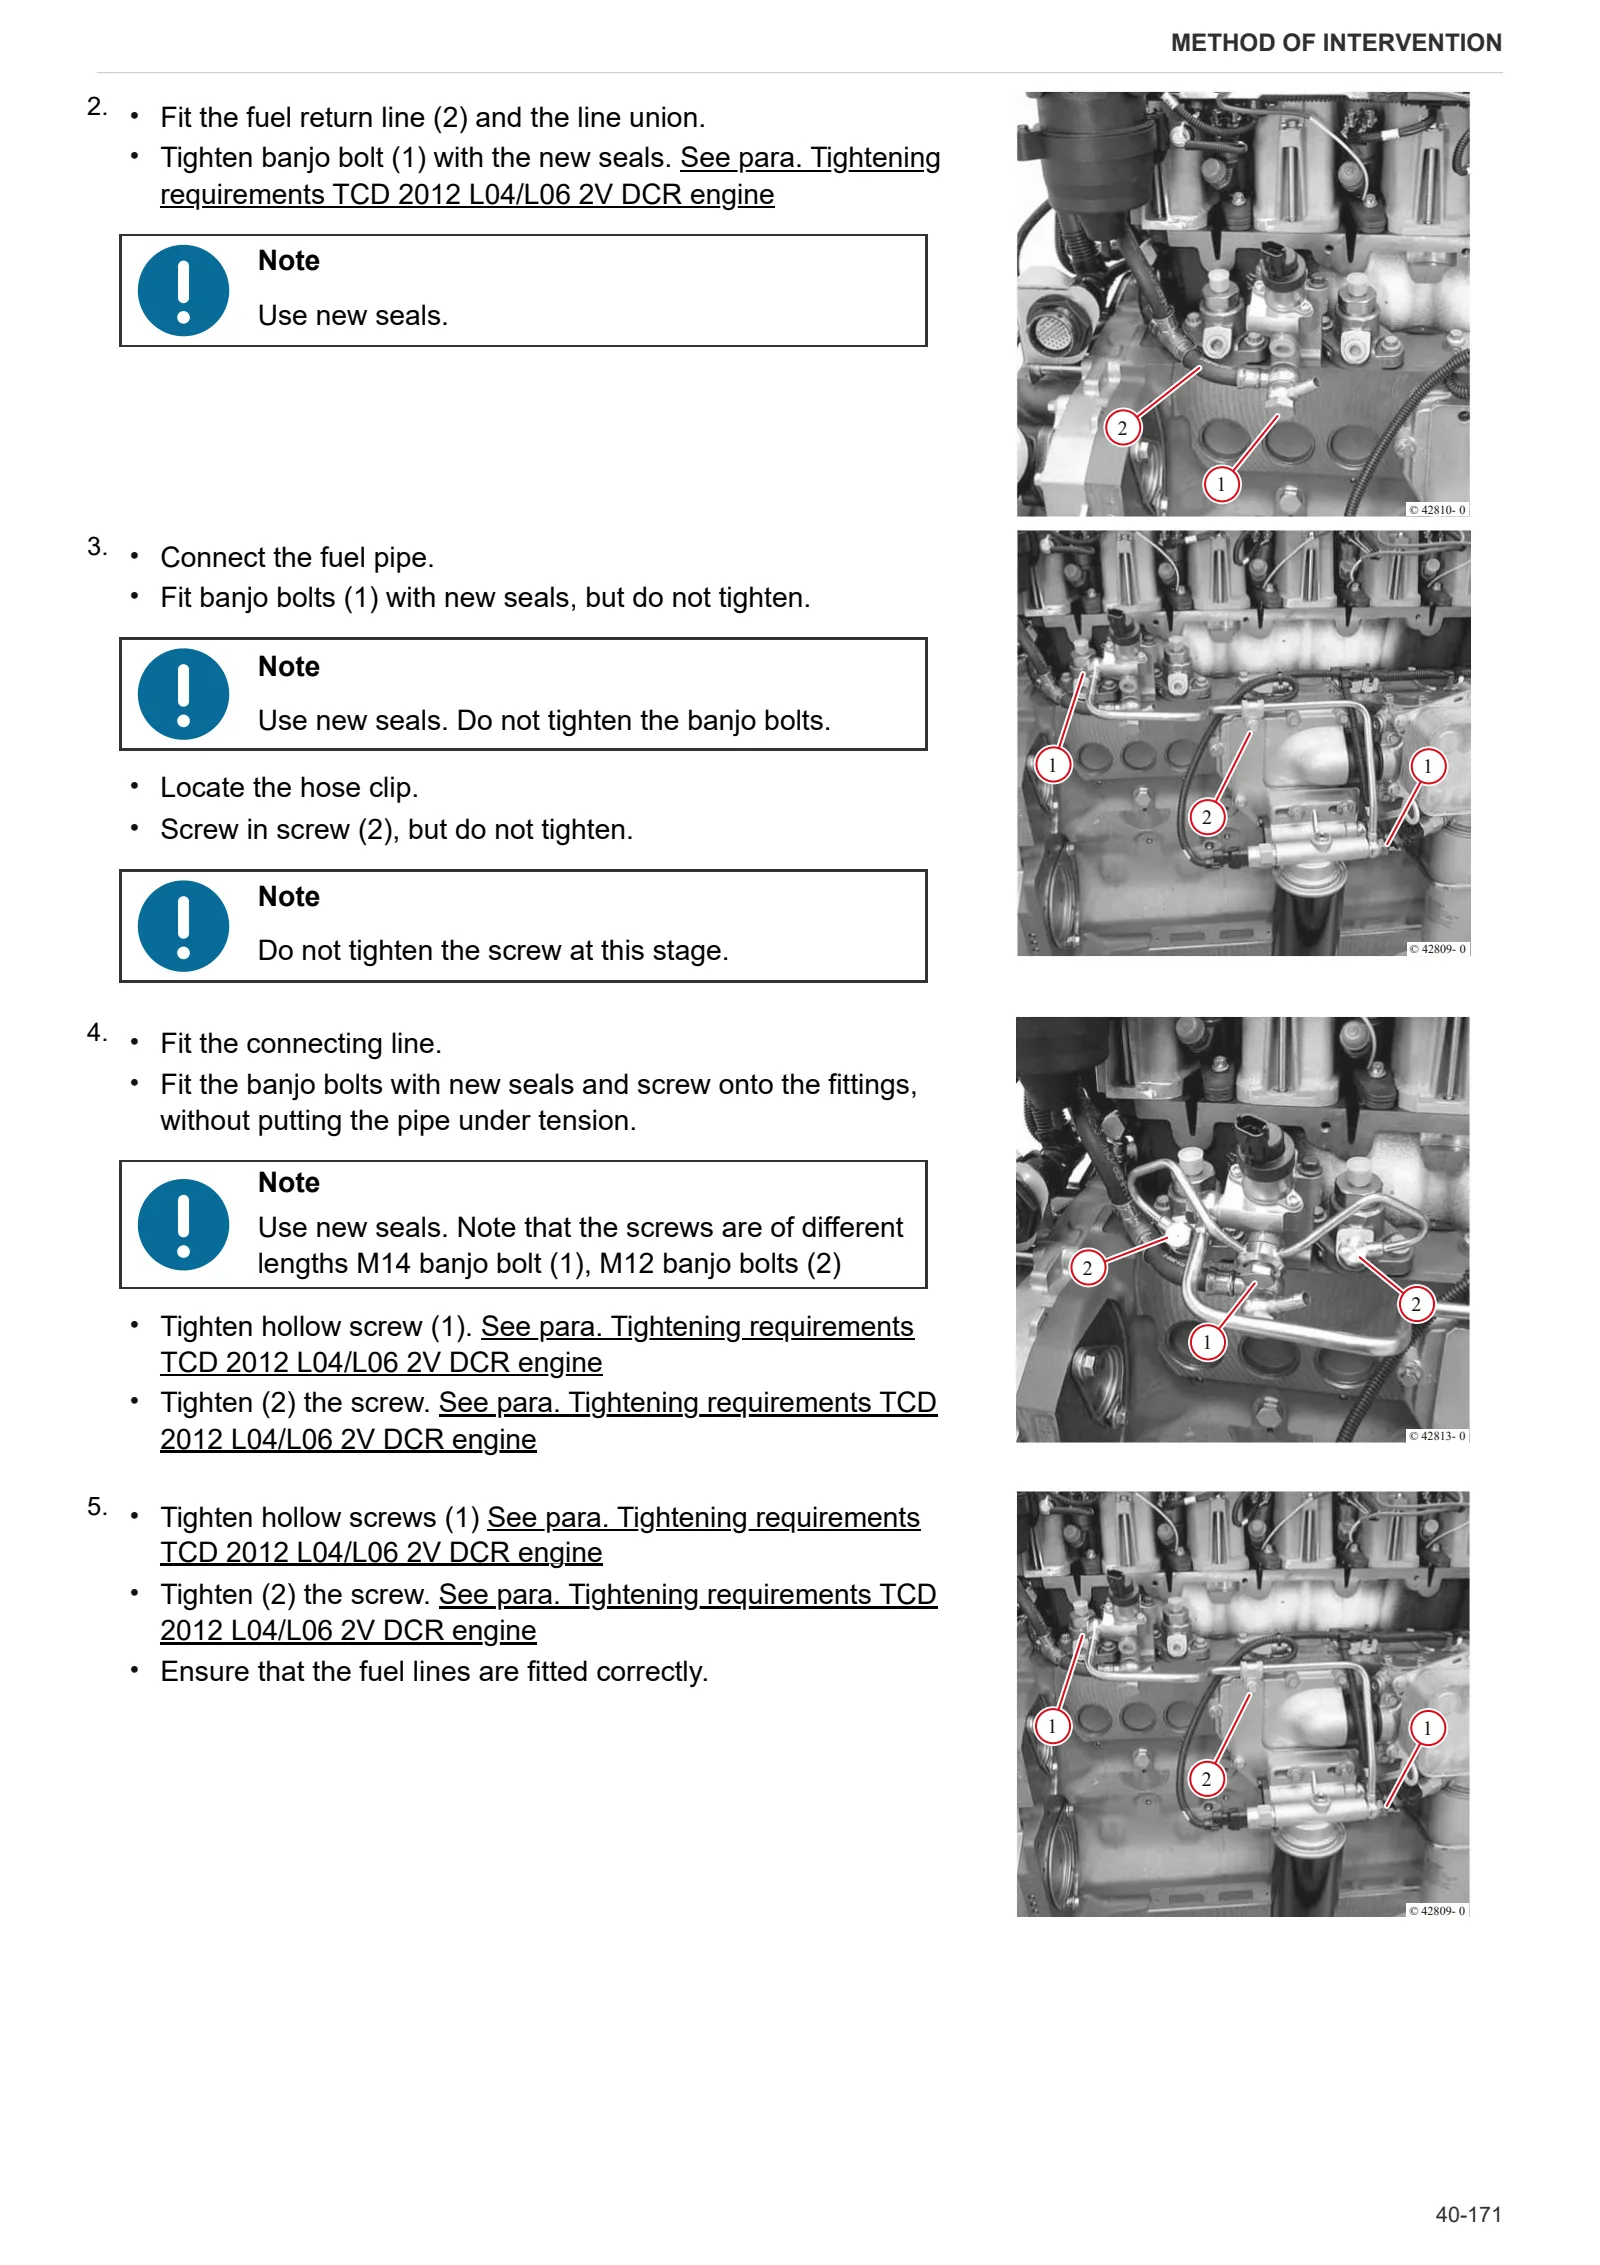
- Removing and fitting the common rail system (L3)
- Removing and fitting injector (L3)
- Removing and fitting the pressure cut-off valve (L3)
- Removing and fitting the fuel pressure transducer (L3)
- Assembly and disassembly of the oil intake pipe (L3)
- Disassembly and assembly of the lubricant oil sump (L3)
- Disassembly and assembly of the oil radiator (L3)
- Removing and fitting the lubricant oil cooler housing (L3)
- Removing and fitting the lubricant oil filter (L3)
- Removing and fitting the oil pressure switch (L3)
- Removing and fitting reservoir (L3)
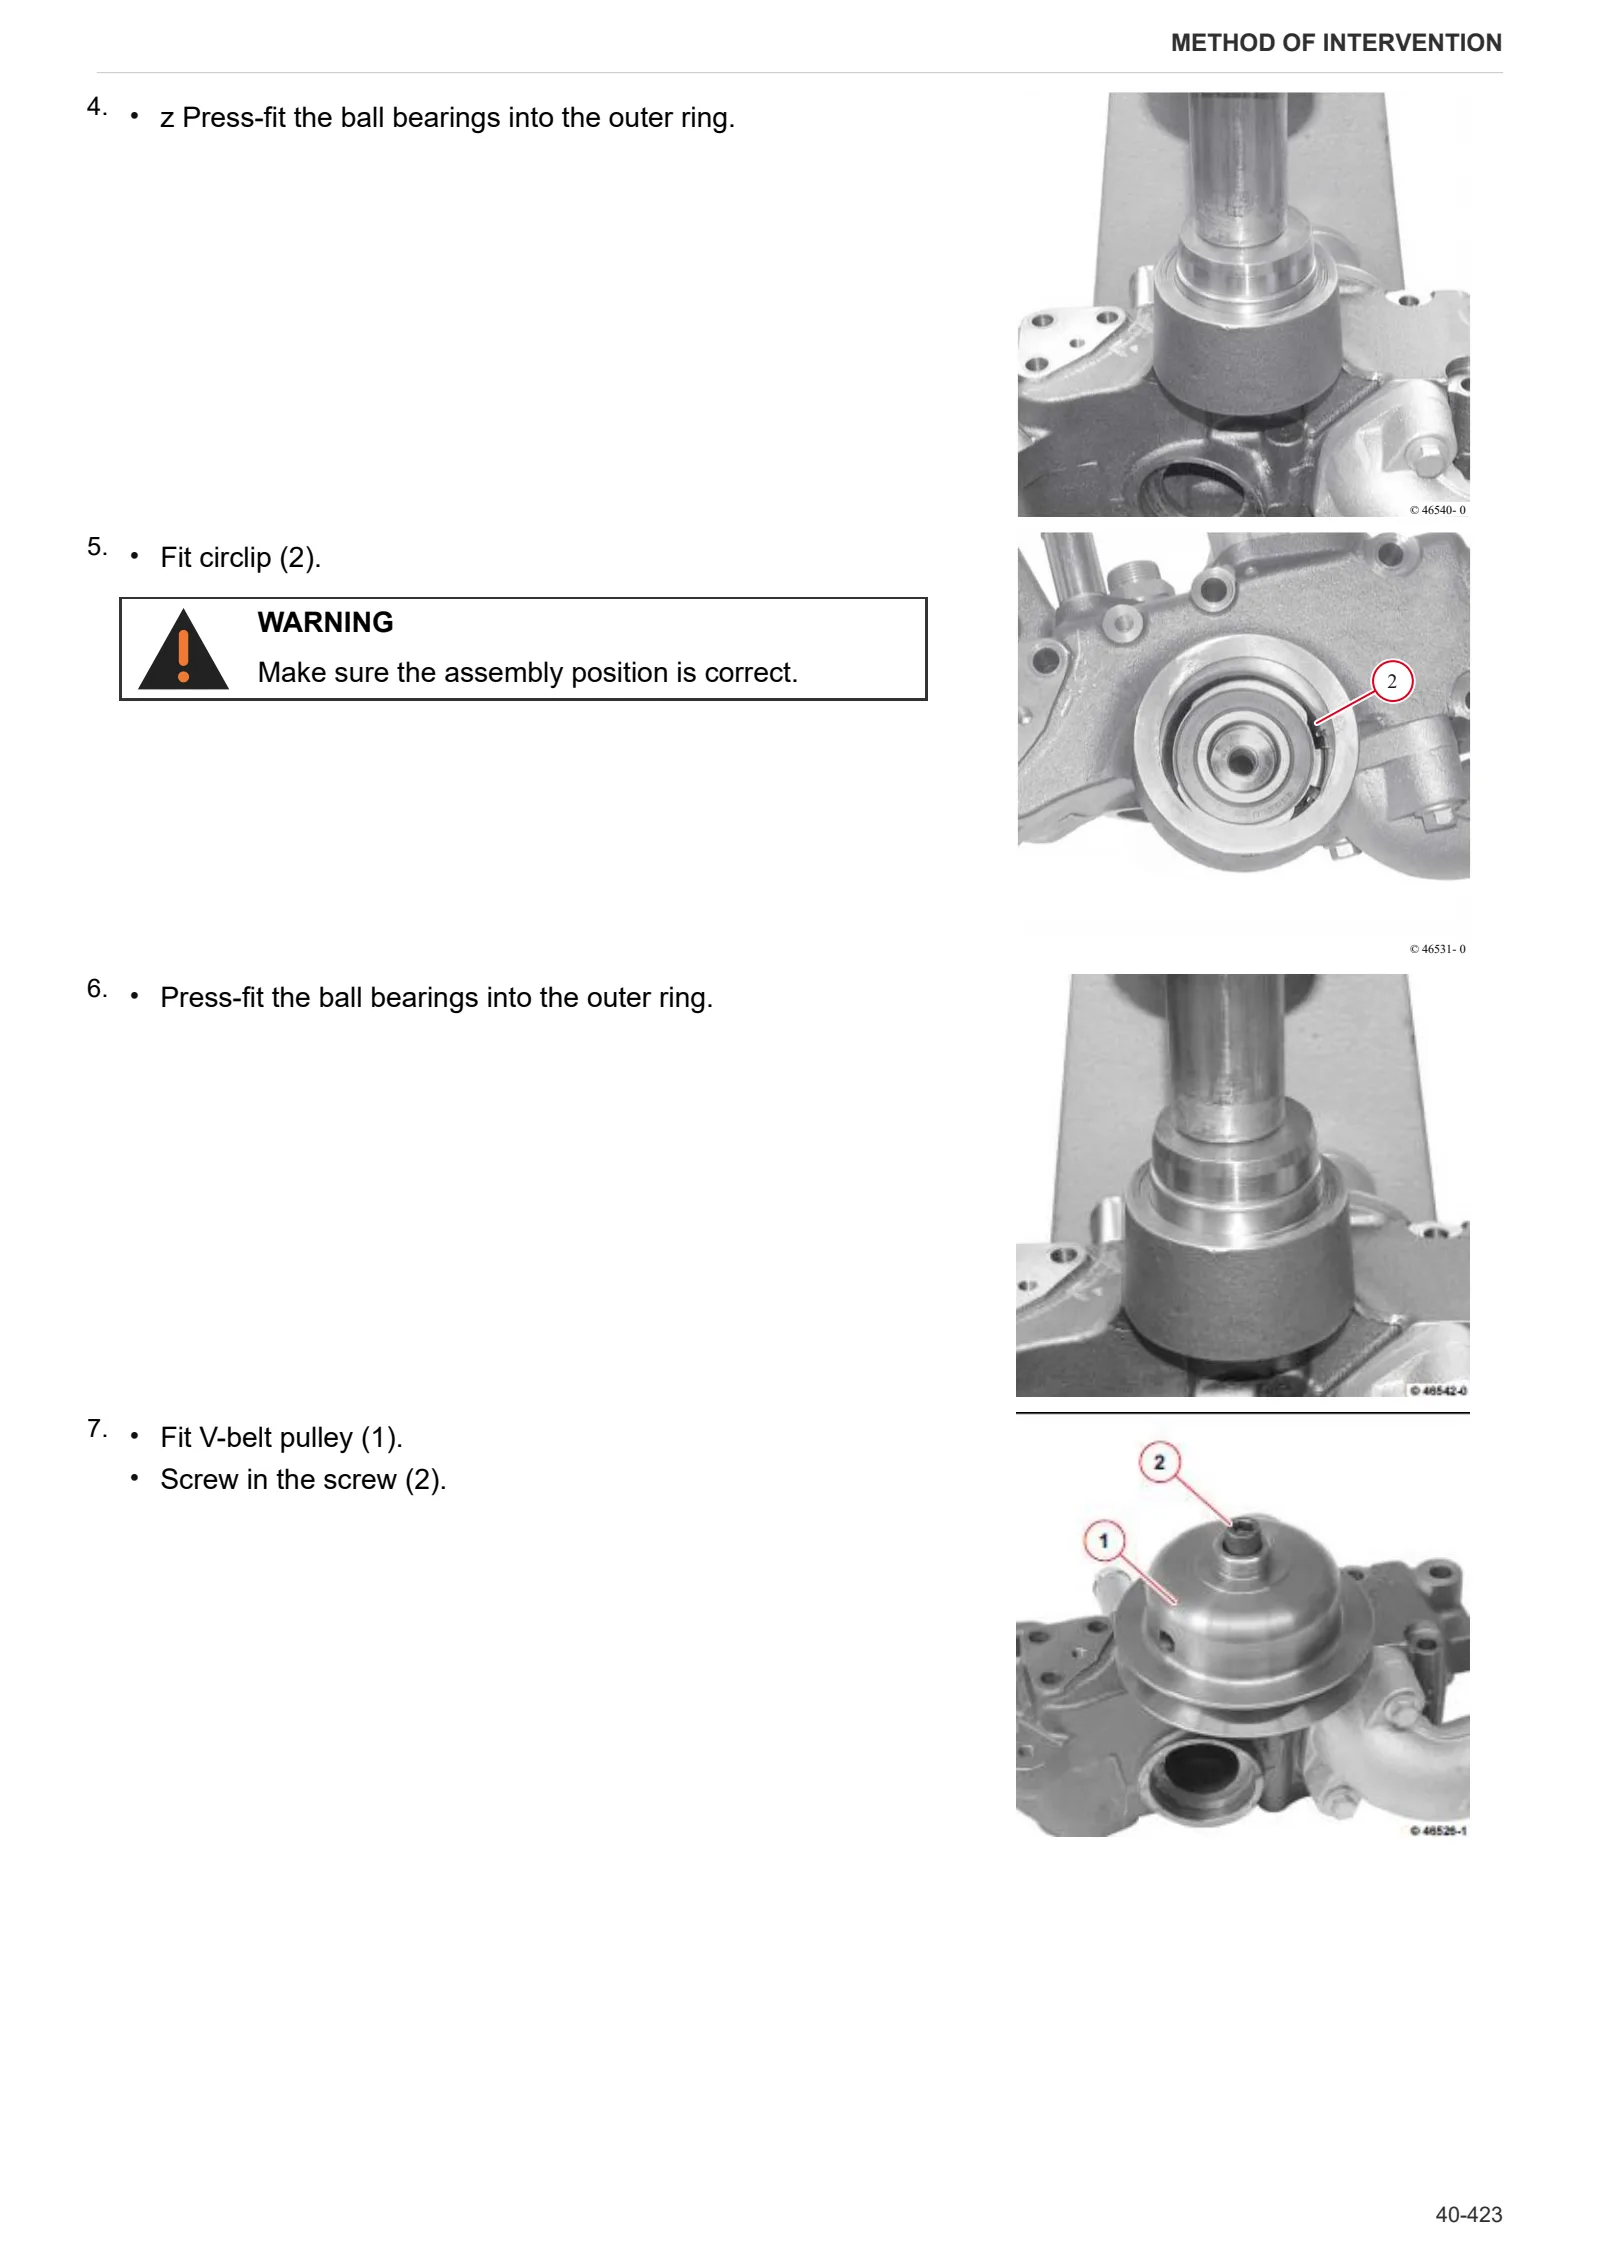
- Removing and fitting the coolant pump (driven by ribbed V-belt) (L3)
- Removing and refitting fan motor (L3)
- Removing and fitting fan motor (L3)
- Removing and fitting fan mount (L3)
- Disassembly and assembly of the torsional vibration damper (L3)
- Removing and fitting belt tensioner (ribbed V-belt) (L3)
- Assembly and disassembly of the flywheel (L3)
- Compression test
- Assembly and disassembly of the engine on the assembly stand
- Adjustment of valve clearance
- Removal and refitting of the rocker arms and pedestals
- Disassemble and complete the rocker and support, check
- Disassembly and assembly of the cylinder head
- Grinding the cylinder head seal surface
- Measuring piston protrusion
- Valve assembly and disassembly
- Valve check
- Check the valve guide
- Replacing the valve guide (oversized – cast)
- Check the valve residual
- Replacing the lined valve seat (oversized)
- Check the endfloat of the crankshaft
- Check the crankshaft
- Replace the crankshaft O-ring (flywheel end)
- Replacing the crankshaft O-ring (opposite end to flywheel)
- Check the connecting rod drum
- Fitting and removing piston pin bush
- Assembly and disassembly of the crankshaft
- Fitting and removing counterweight shafts, checking
- Disassembly and assembly of the piston and connecting rod drum
- Check the piston
- Check the piston rings and piston grooves
- Assembly and disassembly of piston cooling nozzles
- Removal and refitting of the crankcase breather
- Check the cylinder
- Removal and refitting of the front cover (opposite end to flywheel)
- Disassembly and assembly of the connector box
- Fitting and removing the camshaft bearings, checking
- Disassembly and assembly of the gear case cover
- Assembly and disassembly of the camshaft
- Check the camshaft
- Removal and refitting of the rotation device
- Removing and fitting the V-belt pulley
- Fitting, removing, checking and setting adjuster rod
- Removal and refitting of the turbocharger
- Removal and refitting of the charge air duct
- Fitting and removing injection pump
- Determine the thickness of the shim (engine without injection advance variator)
- Determine the thickness of the shim (engine with injection advance variator)
- Determination of the overall dimensions of the injection pump (engine without the injection advance variator)
- Determination of the overall dimensions of the injection pump (engine with the injection advance variator)
- Fitting and removing injection valves
- Checking the injection valves
- Removal and refitting of the fuel lift pump
- Removal and refitting of the oil pickup pipe
- Removing and fitting the lubricant oil sump pan (cast iron lubricant oil sump)
- Disassembly and assembly of the lubricant oil sump (lubricant oil sump-plate)
- Removal and refitting of the oil cooler
- Disassembly and assembly of the oil radiator housing
- Removal and refitting of the oil pressure switch
- Removal and refitting of the water pump
- Removal and assembly of the fan support
- Removal and refitting of the fan support
- Removal and refitting of the flywheel
- Replacing the starter motor ring gear on the flywheel
C0 – Engine accessories
- Replacing the coolant
- Coolant fluid radiator
- Conveyor
- Complete radiator pack
- Engine air intake fan
- Compensation tank
- Intercooler, gearbox oil and fuel heat exchangers
- Air prefilter
- Air filter
- Rigid air filter pipe
- Fuel prefilter
- Bleeding the fuel circuit
- Exhaust pipe
- Intermediate exhaust manifold
- Starter motor
- Removal and refitting of the thermostat
- Testing the thermostat (after removal)
- Removal and refitting of the heater
- Removing and fitting the engine governor
- Removal and refitting of the exhaust manifold
- Removal and refitting of the fuel filter head.
- Assembly and disassembly of the temperature sender
- Removal and refitting the engine block
- Removal and refitting of the alternator (with drivebelt)
- Disassembly and assembly of the starter
- Fitting and removing thermostat (L3)
- Testing the thermostat (after removal)
- Removal and refitting of the crankshaft speed sensor (L3)
- Removal and refitting of the camshaft speed sensor (L3)
- Removing and refitting the exhaust manifold (L3)
- Fitting and removing the solenoid valve (exhaust gas recovery module) (L3)
- Removing and fitting the fuel filter mount (L3)
- Assembly and disassembly of the temperature sender (L3)
- Removal and refitting of the supply air pressure/temperature sender (L3)
- Removing and fitting the alternator (driven by ribbed V-belt) (L3)
- Fitting and removing the rail pressure sensor (L3)
- Disassembly and assembly of the cable bundle (L3)
- Disassembly and assembly of the starter (L3)
- Fitting and removing the glow plugs (L3)
D0 – Transmission
- Changing the transmission oil
- Torsionally flexible coupling and flywheel
- Connector housing
- Separating the gearbox housing from the rear gearbox housing
- Separating Powershift clutch housing from gearbox housing
- Workshop Equipment
- Dismantling transmission housing
- Assembling clutch housing
- Assembling transmission housing
- Separating rear axle from main transmission
- Removing input shaft
- Removing clutch housing from transmission housing and dismantling it
- Mounting clutch housing to transmission housing
- Installing input shaft
- Installing oil supply
- Adjusting crawler gear shift system
- Mounting main transmission to rear axle
E0 – Rear axle
- Instruction for bleeding the brakes
- Rear axle
- Disassembling the axle funnel
- Dismantling the brake
- Dismantling the differential
- Removing PTO gear
- Dismantling the oil supply
- Dismantling the linkage
- Pre-assembling the rear axle housing
- Assembling the linkage
- Assembling the oil supply
- Assembling the control unit
- Assembling the valve block
- PTO gear assembly
- Assembling the PTO shaft coupling
- Assembling PTO shaft shift unit
- Assembling the differential
- Assembling the brake
- Setting the rear wheel brake
- Fitting the axle housing
- Attaching complete rear axle to the transmission casing
F0 – Front axle
- Pinion seal flange
- Steering cylinder assembly
- Planetary reduction gearbox unit
- Wheel hub unit (without service brake)
- Wheel hub and brake assembly
- Beam assembly
- Carrier assembly
- Differential carrier assembly (Limited Slip)
- Differential carrier assembly (Wet Clutch)
- Differential assembly
- Differential assembly (wet clutch)
- Pinion assembly
- Toe-in/steering angle
- Post-assembly tests
- Front axle (4WD)
- Support with front axle
- 4WD shaft
G0 – Bodywork – Cab – Platform
- Seat
- Engine hood
- Cowl mount
- Engine cowl lock
- Lower hood guard
- Battery mount
- Front mudguards
- Mat
- Left hand console
- Instrument cluster
- Instrument cluster
- Cab
- Steering wheel
- Steering column
H0 – Hydraulic system
- Hydrostatic steering (orbitrol)
- “Load Sensing” variable displacement pump
- Disassembly of the rear distributor unit (1/2)
- Disassembly of the rear distributor unit (2/2)
- Rear ancillary distributor
- Disassembling the mechanical rear distributor block
- Rear auxiliary services distributor with flow regulator
- Priority valve
- Brake control valve
- 939420 – Tie-rod installation on brake valve (27/09/2012)
- Air tanks
- Steering system resonator
- Air braking system air filter
L0 – Electrical system
- Battery
- Instrument panel
- Turn indicator control (steering column stalk)
R0 – Rear lift
- Position sensor bushing
- Lift draft sensor
- Lift cylinders
- 3-point linkage
S0 – Wheels
- Front Wheels
- Rear wheels
V0 – Ballast – towing hitches
- Rear towing hitch
- Tow hook
Wiring diagrams
Components
- Engine Control unit
- A – Starting and charging
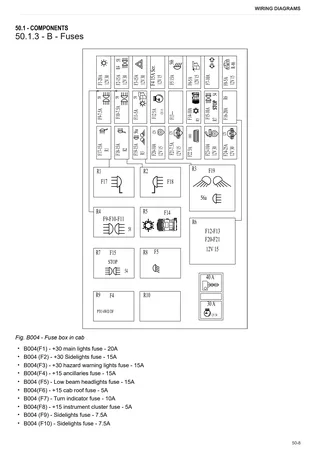
- B – Fuses
- C – Grounds
- D – Intermediate connections
- E – On-board instruments
- F – External lights (rotating beacon)
- G – Interior lights
- H – Manual electrical controls (steering column stalk)
- I – Circuit breakers
- J – Relays
- K – Sensors and transmitters
- L – Electromagnets and solenoid valves
- M – Electrical/electronic devices, Flasher units and Timers
- N – Electric motors and actuators
- O – Resistors and rheostats
- P – Various services
- R – Diagnostics
Systems
- S001 – Power feed, engine start and pre-heat
- S002 – Engine control
- S003 – Sidelights and brake lights
- S004 – Turn indicators
- S005 – Cowl lights
- S006 – Work lights
- S007 – Radio and internal lighting
- S008 – Windscreen wipers
- S009 – Air conditioning
- S010 – PTO and 4WD
- S011 – Instrument cluster and diagnostics
- S012 – Reverse shuttle, electrical power sockets and fuel heater
Wiring harnesses
- Wire colour reference table
- 0.020.2392.4/20 – Low-mounted front work lights
- 0.020.2393.4 – Flashing beacon
- 0.020.2394.4 – Screen washer pumps
- 0.020.2396.4 – Windscreen wiper motor for fixed windscreen
- 0.020.2397.4 – Windscreen wiper motor for opening windscreen
- 0.020.2401.4/10 – LH rear mudguard
- 0.020.2411.4/10 – Air conditioner unit
- 0.020.2413.4 – Cab earth
- 0.020.2419.4/20 – Cowl
- 0.020.2420.4/10 – Front turn indicators and sidelights
- 0.020.4880.4 – Bottom rear work lights
- 0.028.7458.4/10 – Engine
- 0.028.7755.4 – Battery positive terminal
- 0.028.7756.4 – Cab / roof power feed
- 0.028.7757.4 – Front wiring loom
- 0.028.8151.4 – Battery negative
- 0.028.8152.4 – Battery isolator switch
- 0.029.4384.4/10 – Central wiring loom
- 0.029.4482.4/10 – Rear wiring loom
- 0.029.4496.4 – Fuse box on roof
- 0.029.4806.4 – Roof
- 0.029.5015.4 – Roof (version with sun shade canopy)
- 0.029.5078.4 – Cab roof work lights
- 0.029.8336.4 – Preheating
Service Info
A0 – TRACTOR
- Diagnostics 2026 subscription
- After-sales 2026 subscription
- SERVICE NEWS RESEARCH GUIDE
- Diagnostics 2025 subscription
- After-sales 2025 subscription
- Diagnostics 2023 subscription
- Diagnostics 2024 subscription
- Diagnostics 2022 subscription
- Diagnostics 2021 subscription
- After-sales 2024 subscription
- After-sales 2023 subscription
- After-sales 2022 subscription
- After-sales 2021 subscription
- Diagnostics – 2020 subscription
- After-sales – 2020 subscription
B0 – ENGINE
- Deutz AG engine oil specifications
C0 – ENGINE ACCESSORIES
- Diagnostic protocol – AdBlue – Float level unit
- Filter and prefilter tool p/n 5.9035.865.0
- SCR AREA DAMAGED SENSORS
F0 – FRONT AXLE
- Bevel gear set loosing screws
- Check the front axle steering knuckles for wear
- Steering behavior check procedure
G0 – BODYWORK – CAB
- Air conditioning system recharging
H0 – HYDRAULIC AND PNEUMATIC SYSTEM|
- Hydraulic CUNA trailer braking kit (ITALY)
- Single connection hydraulic braking kit availability update – only for EUROPEAN market
- L0 – ELECTRIC AL SYSTEM